Minecraft
- Server Basics
- How to Connect to your server (Java)
- How to Upload your own World
- How to Upload & Remove Plugins
- Pre-Generating your world
- How to create, and manage a Server Backup
- Intermediate Server Guides
- Advanced Server Guides
- Frequently Asked Questions
Server Basics
These guides are for people who are brand new to hosting their own Minecraft Server
How to Connect to your server (Java)
This page will explain how to find your connection address, and connect to your Java Minecraft Server
Acquire the Connection Address
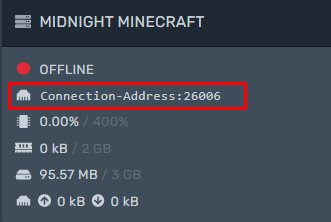
Finding your server connection address is easy, Go to the Console Tab of your server and you should see the connection address in
the information window on the left of the terminal window, You can left click your connection address to copy it to your clipboard
Connection Address
Connect to your server
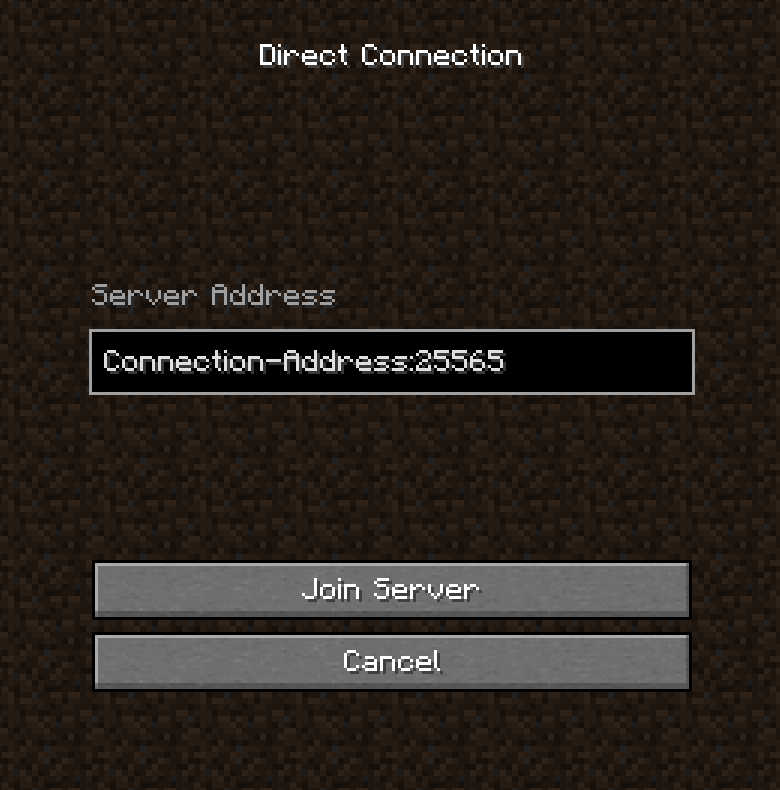
Direct Connection
- To join via direct connection, Copy the connection address mentioned above,
- in Minecraft From the main menu click

- When in the multiplayer menu, Click

- Paste your connection address in the provided text box, and hit Join Server
Direct connection image
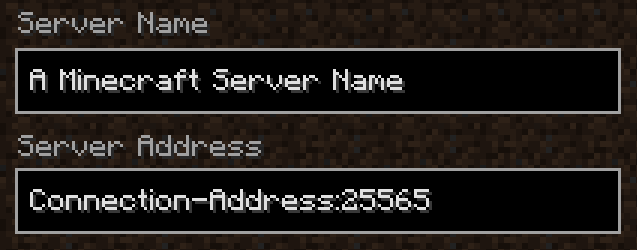
Add to Ingame Server List
- To add your Server into your ingame Server List, Copy the connection address mentioned above
- in Minecraft, from the main menu click
- When in the multiplayer menu click,

- Name the server, and paste your connection address in "Server Address" click Done when you are finished
How to Upload your own World
This page will inform you how to upload your own world, and how to change the configuration to "activate" the world
There are several sources you can find a world file from, be it your game save folder, a public world from Minecraft Forums, or From a previous server you have ran in the past, But first things first you want to get your world file ready
Your server must have been ran once to go through a pre-setup before you upload your world
Locating World Save
to locate your save is a rather simple process, To start off you want to:
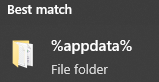
- Hit start (windows key) and type " %appdata% " and click the resulting folder

-
Locate the .Minecraft folder

-
Locate the saves folder

-
Locate and send a copy of your world folder to desktop (the folder name will be name of your world)


Best practice to rename the copy with a - (dash) instead of a space
Compress World folder & Upload to panel
In our previous step we have located our save file and sent it to the desktop
- Create a ZIP folder on your desktop (name can be whatever) and drag your world folder into it
- login to the Game Panel, Locate target server, And open the File Manager
- Drag & Drop your created ZIP folder with your world in it
- right click the uploaded ZIP folder on the File Manager, and click "Decompress"
Changing the world that the server uses
There are a couple steps that require editing the "server.properties" text file.
info on how to use multiverse to have multiple worlds will be in a future page
- In the File Manager locate "server.properties" Click it to enter the text editor
- Locate "level-name=world" Typically on, or around line 10
- change "world" to the name of the decompressed world folder that you have uploaded
- Click the "Save Content" button at the bottom right of the text editor
- Head over to the Console Tab of your server, and start your server again
How to Upload & Remove Plugins
Plugins are a very simple and useful way to customize your server in many aspects. If your looking to browse for plugins to use look though Spigot's Plugin Resources. You can download plugins without an account, but it is very useful to create an account with them.
If you are looking for a specific resource, Use google to search: "(Plugin name) Spigot" to find the resource quicker
Installing Plugins
We're going to be using Luckperms for our demonstration, though Once you have found a plugin you would like to install
-
Download the plugin with the button at the top right of the page:
 (Save/move to desktop for ease of use)
 -
In the File Manager, Navigate to your Plugins Folder, Drag & Drop your downloaded plugin in the window
- Start/Restart your server
Removing Plugins
To remove a plugin you will first need to stop your server in the console tab
To Fully remove a plugin you will need to remove the Plugin.jar, as well as the plugin data folder
You can disable plugins by renaming the plugin with ".jarx" as the file extention
Pre-Generating your world
Pre-generation of your world can massively help with any lag you may be experiencing with your Minecraft Server. In newer versions of Minecraft, Chunk Generation has been severely overhauled, while worlds look fancier, there is much more load on the server when players are wandering around. Generating a small area around your server spawn is a good idea
This guide assumes you have permissions setup and know how to install a plugin, If not please view this page
How to upload a plugin And/or Permissions Quick-Start Guide
Finding a world Pre-generation plugin
There are several plugins out there that will work in generating your world, You can look around on the Spigot Resource Page
We highly recommend the usage of: Chunky, Its an efficient world pre-generation plugin and is what the guide will be based on
Pre-generation settings
You are going to need to define a couple settings for the generator to know how much of the world you would like pre-generated, what shape you would like the world to be generated in (https://github.com/pop4959/Chunky/wiki/Shapes)
chunky shape "shape"
chunky radius "number"
When generating your world, more Disk Space will be used depending on how many blocks/chunks generated
Starting the Pre-Generator
before starting the pre-generator "center" where the generation will take place, And make sure you have set the Radius & Shape
- Find a good spot for your server spawn point
- type:
/chunky center - type:
/chunky start
Your server may be unplayable from the lag caused by this process, It is best to do it when people aren't playing
How to create, and manage a Server Backup
Creating a server backup is a 3 step process, From there you can choose through a list of options to manage your server backups
Creating a backup
- Navigate to the backups tab

- Click the button:

- Name your backup and click:

Managing backups
To manage your backups click "..." on your desired backup

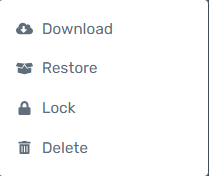
Download: Downloads your selected backup in a tar.gz file
Restore: Restores your backup to your server (Destructive)
Lock/Unlock: Prevents accidental deletion
Delete: Deletes the selected backup
Intermediate Server Guides
These guides are for people who have basic-intermediate knowledge on how to run a Minecraft Server
Permissions Quick-Start Guide
Permissions is a system that tells the server/plugins who can use what command/feature and difficulty can range from beginner, to expert level, But this small guide is hopefully able to help you understand a bit more about this complex system
This Guide is based off of the use of the Luckperms permission plugin
To start things off we would like to personally recommend Luckperms as your permissions plugin as it has
- A visual web editor to manage permissions with, making Luckperms one of the easiest to use permissions plugin.
- Mysql Database compatibility if you want to have more advanced setups with multiple servers
- Contexts, (under what circumstances will this permission apply) and much more
If you need help installing a plugin to your server, Please visit the page: How to Upload & Remove Plugins
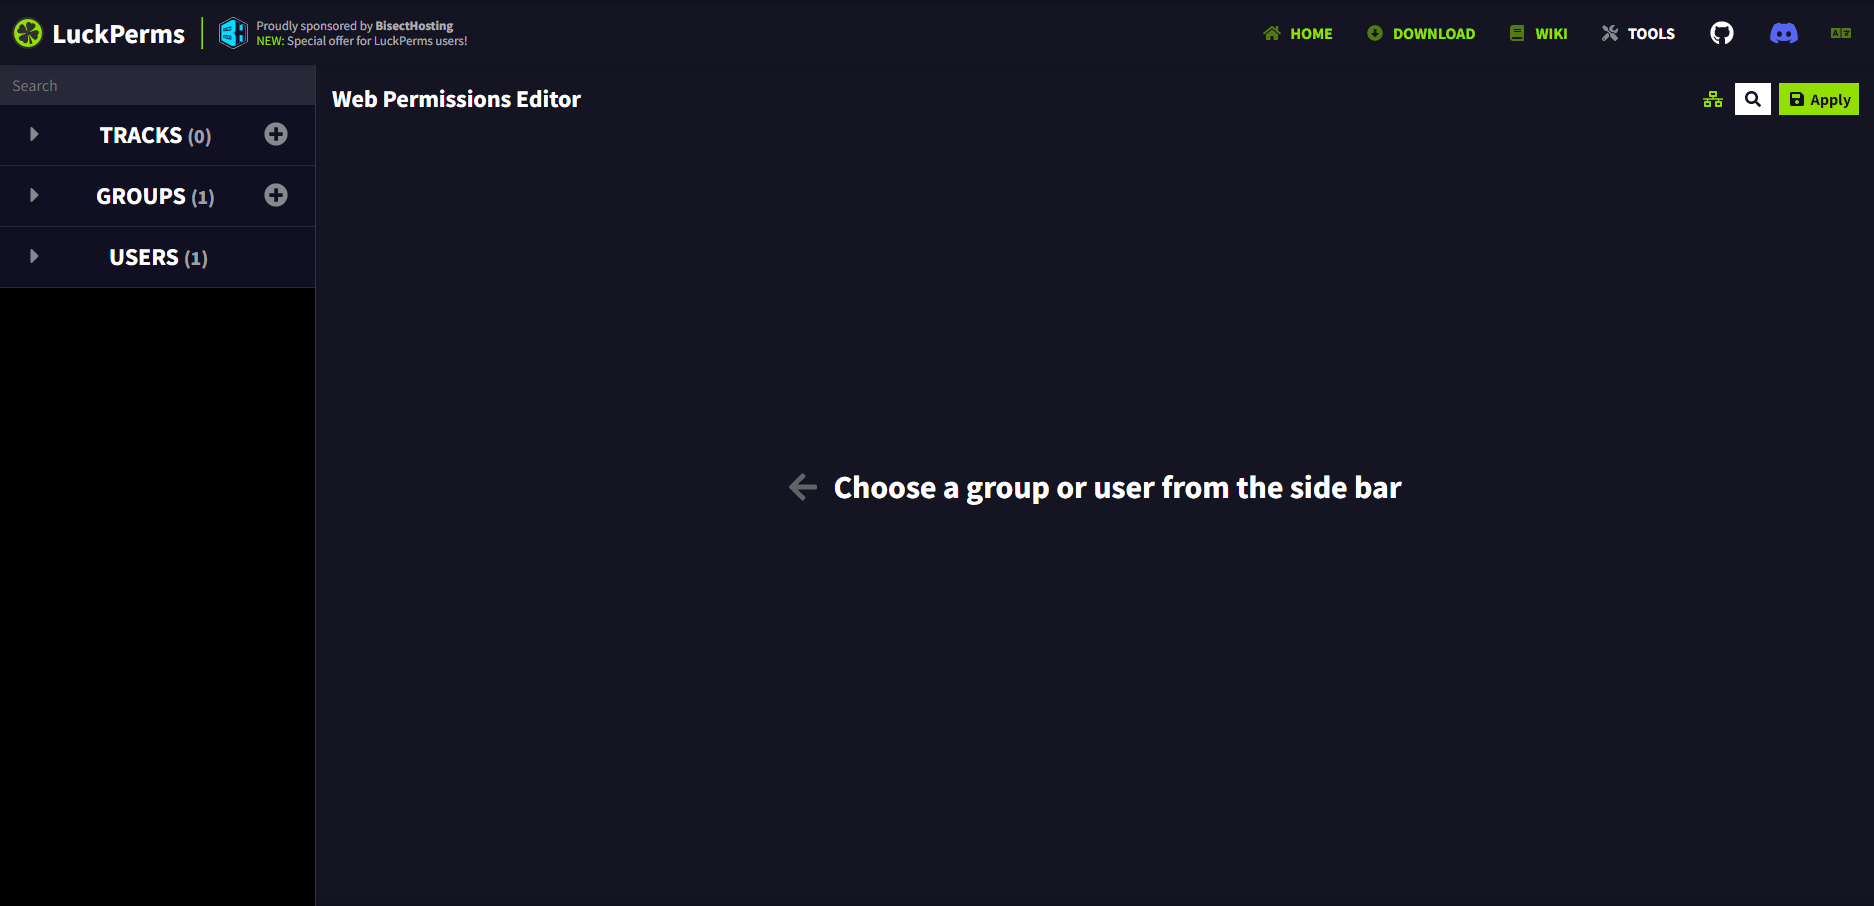
First access to the Luckperms Web Editor
The Luckperms web editor is a intuitive way to visually manage your permissions system
- Join your Minecraft server ingame, and Navigate to the Console tab on the Game Panel
-
type in the terminal:
lp user "yourusername" permission set *(remove parenthesis "", fill your ingame name in) - ingame type:
/lp editorand you will be given a link to access your permission web editor
Web editor of a fresh installation (expandable)
Creating your first Group
A Group is a functional title making applying permissions easier, every player will gain permissions applied to the default group
To create a group Click the plus button next to groups ![]()
This will open a prompt asking for multiple different pieces of information Look in the "create group prompt" dropdown for short expiations of each option
Once your group has been created it'll auto create some permissions then you can then start applying permissions to the group
Create Group Prompt (expandable)
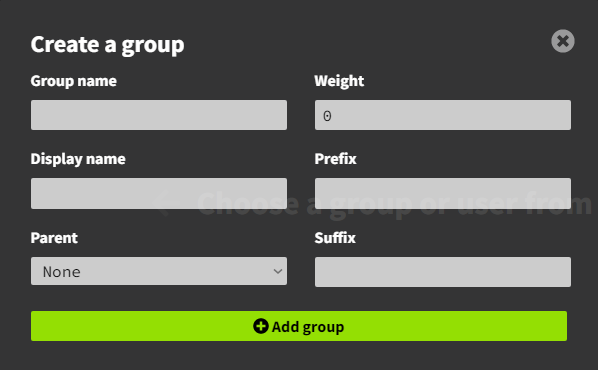
Group Name: Name of the group on web editor and commands
Weight: Higher weighted groups will override lower weighted groups
Display Name: Sets the groups display name. This can effectively be used as an "alias" for the group.
Prefix: is a piece of text shown before a player name in chat (ex. [Member], [Mod], [Admin])
Parent: Will gain permissions from selected group
Suffix: is a piece of text shown after a player name in chat
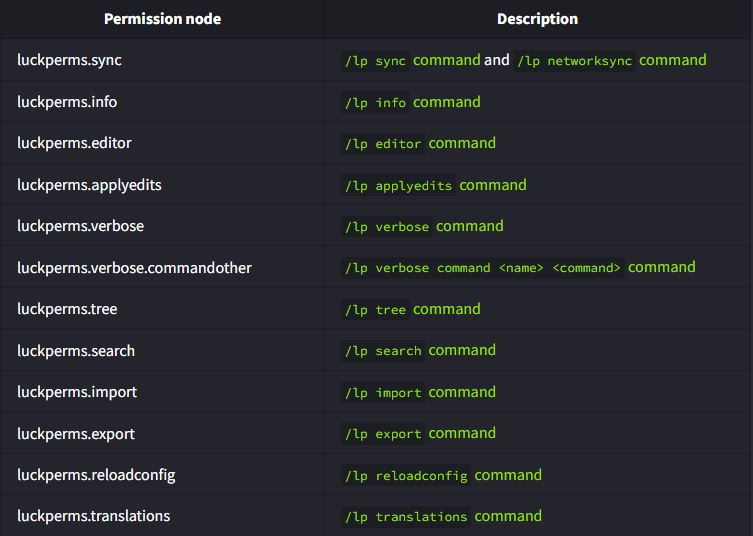
Finding Plugin Permissions
Permissions will be different for each plugin. to find permissions specific to your plugin, look around the spigot page where you downloaded it from, You can also google: Plugin name permission nodes
Example of plugin permission nodes (expandable)
Assigning permissions
To assign permissions ingame type: /lp group (group) permission set (permission.node) (Take out the () in the command)
In the Luckperms Web editor, Navigate to the Groups tab, Select your newly created group and you will see a new window pop up
Luckperms Web editor (Expand to see example)
Overview of the group: Member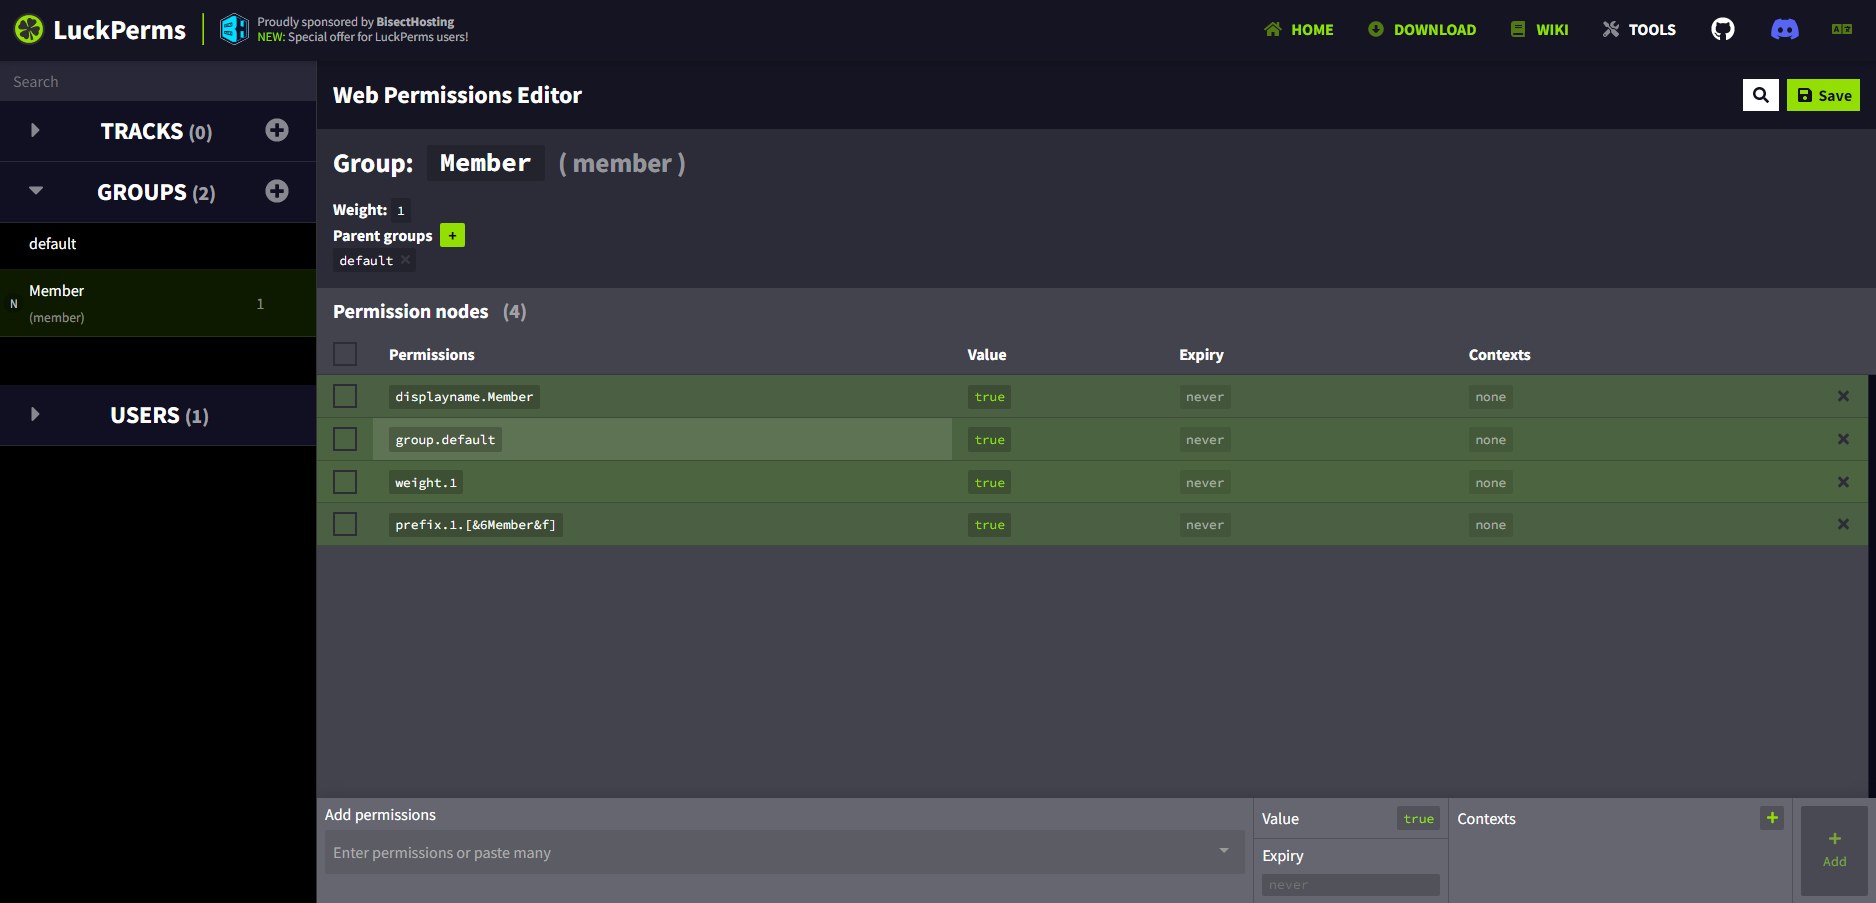
At the bottom you will a light gray bar, This will be the area you will be adding permissions
- Paste your permission node into the "Add Permission" textbox, After hitting enter, you can paste another permission in
- click the "Add" button on the far right of the light gray bar, You will notice newly added permissions will be lit up green
- Once you are done adding your permission(s), Hit the save button on the top right of the page
- It will generate you a link, You will want to take that link and paste it in your server (either ingame or in console terminal)
By no means is this a complete explanation of this powerful tool If you are looking for more advanced information, We highly suggest checking out the Luckperms Wiki
Geyser Setup (Bedrock & Java)
Geyser is a Spigot/Paper Plugin that gives Bedrock Players the ability to join and play on a Java Server
A Port must be opened to be able to use this plugin. Make a ticket on our discord server and we will get that sorted for you.
Spigot/Paper Setup
- The server must allow connections from the latest versions, Either by using ViaVersion, or updating your server.
- The server Must be running at least java 16. You can change this under your Settings Tab, If you must use a version below java 16, Create a ticket with us; We will add this startup flag for you: "DPaper.ignoreJavaVersion=true"
Step 1:
Step 2:
- Open server.properties and make sure "enforce-secure-profile" is set to false
- Restart your server to generate any necessary files
Step 3:
- Open /plugins/Geyser-Spigot/config.yml
- On Line 15 Change the port listed there to the assigned port we have given your in your Support Ticket.
- On Line 49 Change auth-type: to "floodgate"
- Restart your server to apply new changes
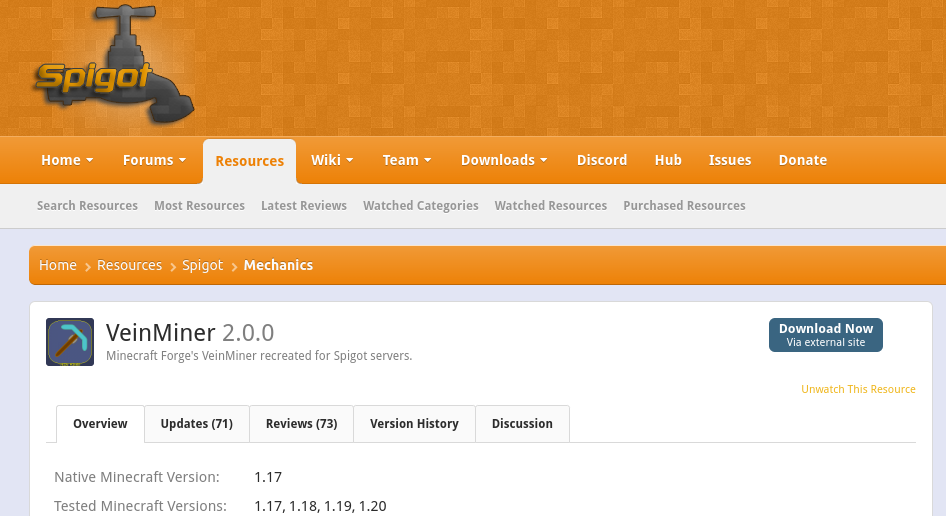
VeinMiner Plugin
VeinMiner is a Minecraft plugin that allows players to mine entire veins of ores or resources with a single swing of their tool.
Here's how to install and configure the plugin:
Step 1:
Download the plugin from: https://www.spigotmc.org/resources/veinminer.12038/
Step 2:
Go to the Midnight hosting panel and select File Managers -> plugins
From there click the Upload button, Locate the plugin, select it, and then upload it. Alternatively, you could just drag and drop the plugin from your desktop into the plugins folder. Make sure that the file is uploaded before continuing on.

Step 3:
Now that it is in the server files, all you need to do is restart your server to activate the plugin. It's that easy! The steps after this are optional but are recommended to look at.
![]()
Step 4:
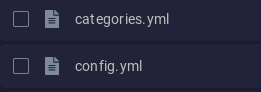
Now in the Plugins folder, you should see Veinminer click on it to access its contents.

Within this folder, there are two editable files. Categories.yml, and Config.yml, and the third file doesn't need to be updated. Lets Click on the config file.
Highlighted text below is edited to help explain the section better.
config.yml
MetricsEnabled: true
PerformUpdateChecks: true
DefaultActivationStrategy: SNEAK # The default activation strategy to set for players that have not explicitly set it
DefaultVeinMiningPattern: 'veinminer:default' # The vein mining pattern to use by default for new players
CollectItemsAtSource: true # Whether items from vein mines will be dropped at the source block
NerfMcMMO: false # If true, only grants McMMO experience for the FIRST block mined in a vein, as opposed to all blocks if false
RepairFriendly: false # Whether or not vein miner will stop vein mining if the tool reaches 1 durability while mining
MaxVeinSize: 64 # The maximum size of a vein for all categories (unless otherwise specified in the categories.yml)
Cost: 0.0 # The cost per use of vein miner. This requires Vault and an economy plugin to be installed
DisabledGameModes: # A list of game modes in which VienMiner is disabled
- CREATIVE
- SPECTATOR
DisabledWorlds: # A list of all worlds in which VeinMiner is disabled
- WorldName
Hunger: # Various hunger-related options
HungerModifier: 4.0 # How much exhaustion is applied for every block broken while vein mining. Every point is 0.025 hunger/exhaustion per block
MinimumFoodLevel: 1 # The minimum food level required to vein mine. If vein mining while this value is hit, it will stop
HungryMessage: "&7You are too hungry to vein mine!" # The message to send the player when they are too hungry
Client: # Options that allow better control over the optional client-sided mod
AllowActivationKeybind: true # Whether or not the VeinMiner Companion mod is allowed to activate vein miner with a key bind
AllowPatternSwitchingKeybind: true # Whether or not the VeinMiner Companion mod is allowed to switch patterns with key binds
AllowWireframeRendering: true # Whether or not the VeinMiner Companion mod is allowed to render wireframes around vein mineable blocks
Storage:
# Supported types...
# JSON: Each player's data is stored in its own JSON file under the specified directory.
# SQLite: Player data is stored in an SQLite database table. A flat file database. Generally faster than JSON.
# MySQL: Player data is stored remotely in a MySQL-compliant database (MySQL, MariaDB, etc.). Use this if you want to share VeinMiner data on multiple servers and have a MySQL server available to use.
Type: 'SQLite'
JSON: # Only required if "Type" is set to "JSON"
Directory: '%plugin%/playerdata/' # "%plugin%" is replaced with the plugin directory
MySQL: # Only required if "Type" is set to "MySQL"
Host: 'localhost' # The database host
Port: 3306 # The database port
Username: 'username' # The database username
Password: 'password' # The database password
Database: 'veinminer' # The specific database to use
TablePrefix: 'veinminer_' # The prefix to use for all created tables
# This BlockList option is dynamic. For every entry in the BlockList (i.e. "Pickaxe", "Axe", "Shovel", etc.),
# an entry with the exact same ID is listed in the categories.yml
BlockList: # To find a full list of Minecraft Item ID's you can check out https://minecraftitemids.com/
Pickaxe: # A list of all blocks breakable by the "Pickaxe" category
- 'minecraft:amethyst_cluster'
- 'minecraft:ancient_debris'
- 'minecraft:coal_ore'
- 'minecraft:copper_ore'
- 'minecraft:deepslate_coal_ore'
- 'minecraft:deepslate_copper_ore'
- 'minecraft:deepslate_diamond_ore'
- 'minecraft:deepslate_emerald_ore'
- 'minecraft:deepslate_gold_ore'
- 'minecraft:deepslate_iron_ore'
- 'minecraft:deepslate_lapis_ore'
- 'minecraft:deepslate_redstone_ore'
- 'minecraft:diamond_ore'
- 'minecraft:emerald_ore'
- 'minecraft:gold_ore'
- 'minecraft:iron_ore'
- 'minecraft:lapis_ore'
- 'minecraft:nether_quartz_ore'
- 'minecraft:nether_gold_ore'
- 'minecraft:raw_copper_block'
- 'minecraft:raw_gold_block'
- 'minecraft:raw_iron_block'
- 'minecraft:redstone_ore'
Axe: # A list of all blocks breakable by the "Axe" category
- 'minecraft:acacia_log'
- 'minecraft:acacia_wood'
- 'minecraft:birch_log'
- 'minecraft:birch_wood'
- 'minecraft:brown_mushroom_block'
- 'minecraft:carved_pumpkin'
- 'minecraft:crimson_hyphae'
- 'minecraft:crimson_stem'
- 'minecraft:dark_oak_log'
- 'minecraft:dark_oak_wood'
- 'minecraft:jungle_log'
- 'minecraft:jungle_wood'
- 'minecraft:mangrove_log'
- 'minecraft:mangrove_roots'
- 'minecraft:mangrove_wood'
- 'minecraft:melon'
- 'minecraft:oak_log'
- 'minecraft:oak_wood'
- 'minecraft:pumpkin'
- 'minecraft:red_mushroom_block'
- 'minecraft:spruce_log'
- 'minecraft:spruce_wood'
- 'minecraft:warped_stem'
- 'minecraft:warped_hyphae'
Shovel: # A list of all blocks breakable by the "Shovel" category
- 'minecraft:clay'
- 'minecraft:gravel'
- 'minecraft:mud'
- 'minecraft:muddy_mangrove_roots'
- 'minecraft:powder_snow'
- 'minecraft:sand'
- 'minecraft:snow'
- 'minecraft:soul_sand'
- 'minecraft:soul_soil'
Hoe: # A list of all blocks breakable by the "Hoe" category
- 'minecraft:beetroots[age=3]'
- 'minecraft:brown_mushroom'
- 'minecraft:carrots[age=7]'
- 'minecraft:moss_block'
- 'minecraft:moss_carpet'
- 'minecraft:potatoes[age=7]'
- 'minecraft:red_mushroom'
- 'minecraft:sculk'
- 'minecraft:sculk_vein'
- 'minecraft:wheat[age=7]'
Shears: # A list of all blocks breakable by the "Shears" category
- 'minecraft:acacia_leaves'
- 'minecraft:azalea_leaves'
- 'minecraft:birch_leaves'
- 'minecraft:black_wool'
- 'minecraft:blue_wool'
- 'minecraft:brown_wool'
- 'minecraft:cobweb'
- 'minecraft:cyan_wool'
- 'minecraft:dark_oak_leaves'
- 'minecraft:flowering_azalea_leaves'
- 'minecraft:gray_wool'
- 'minecraft:green_wool'
- 'minecraft:jungle_leaves'
- 'minecraft:light_blue_wool'
- 'minecraft:light_gray_wool'
- 'minecraft:lime_wool'
- 'minecraft:magenta_wool'
- 'minecraft:mangrove_leaves'
- 'minecraft:oak_leaves'
- 'minecraft:orange_wool'
- 'minecraft:pink_wool'
- 'minecraft:purple_wool'
- 'minecraft:red_wool'
- 'minecraft:spruce_leaves'
- 'minecraft:white_wool'
- 'minecraft:yellow_wool'
Hand: [] # A list of all blocks breakable by the "Hand" category (empty by default)
All: # A list of all blocks breakable by all registered categories
- 'minecraft:ice'
- 'minecraft:packed_ice'
- 'minecraft:blue_ice'
# A list of collections of blocks that should be calculated in the same vein
# For example, when mining a red mushroom block, brown mushroom blocks will also be broken in the same vein
Aliases:
- 'minecraft:acacia_log;minecraft:acacia_wood'
- 'minecraft:birch_log;minecraft:birch_wood'
- 'minecraft:brown_mushroom_block;minecraft:red_mushroom_block'
- 'minecraft:carved_pumpkin;minecraft:pumpkin'
- 'minecraft:crimson_hyphae;minecraft:crimson_stem'
- 'minecraft:dark_oak_log;minecraft:dark_oak_wood'
- 'minecraft:grass;minecraft:tall_grass'
- 'minecraft:jungle_log;minecraft:jungle_wood'
- 'minecraft:mangrove_log;minecraft:mangrove_wood'
- 'minecraft:oak_log;minecraft:oak_wood'
- 'minecraft:spruce_log;minecraft:spruce_wood'
- 'minecraft:warped_hyphae;minecraft:warped_stem'
After making changes please remember to save.
Step 5:
If you want an item that isn't on the list to have its own vein miner properties click categories.yml
Categories.yml example
How this works:
Each category is structured like this
"Name of Category":
Items: #The items that are considered to be part of said category.
- 'minecraft:wooden_axe' #This can be any in-game item.
- 'minecraft:stone_axe'
Example category:
This is an example of a custom category. The stick is now part of a stick category.
Stick:
Items:
- 'minecraft:stick'
Default categories.yml
Axe:
Items:
- 'minecraft:wooden_axe'
- 'minecraft:stone_axe'
- 'minecraft:golden_axe'
- 'minecraft:iron_axe'
- 'minecraft:diamond_axe'
- 'minecraft:netherite_axe'
Hoe:
Items:
- 'minecraft:wooden_hoe'
- 'minecraft:stone_hoe'
- 'minecraft:golden_hoe'
- 'minecraft:iron_hoe'
- 'minecraft:diamond_hoe'
- 'minecraft:netherite_hoe'
Pickaxe:
Items:
- 'minecraft:wooden_pickaxe'
- 'minecraft:stone_pickaxe'
- 'minecraft:golden_pickaxe'
- 'minecraft:iron_pickaxe'
- 'minecraft:diamond_pickaxe'
- 'minecraft:netherite_pickaxe'
Shears:
Items:
- 'minecraft:shears'
Shovel:
Items:
- 'minecraft:wooden_shovel'
- 'minecraft:stone_shovel'
- 'minecraft:golden_shovel'
- 'minecraft:iron_shovel'
- 'minecraft:diamond_shovel'
- 'minecraft:netherite_shovel'
Remember to save the file!
After learning how to set up a category you can now add this category to the config file.
custom category
This is a cropped version of config.yml please don't use just this...
...
This is a basic view on the vein minable in-game blocks
BlockList:
Pickaxe: # The category name. Everything below it is a list of the breakable material that the category can vein mine.
- 'minecraft:amethyst_cluster'
- 'minecraft:ancient_debris'
- 'minecraft:coal_ore'
- 'minecraft:copper_ore'
- 'minecraft:deepslate_coal_ore'
- 'minecraft:deepslate_copper_ore'
Lets add our "Stick" category to break coarse dirt, and leaves
BlockList:
Stick:
- 'minecraft:coarse_dirt'
- 'minecraft:oak_leaves'
- 'minecraft:dark_oak_leaves'
- 'minecraft:birch_leaves'
- 'minecraft:jungle_leaves'
- 'minecraft:spruce_leaves'
Now in-game a stick can veinmine coarse dirt, and the selected leaves.
That's how you add a custom category.
Step 6:
If you are needing help with anything else join the Official Discord to get more advanced help. Or look at the plugin's website to get more info.
Advanced Server Guides
These guides are made for people with intermediate knowledge about Minecraft server hosting
Frequently Asked Questions
Does MHS support Mods & Plugins?
Naturally! Our game panel was designed with accessibility and ease of use in mind.
Mods, Modpacks, and Plugins can be installed with one click in their respective categories
If you are an advanced user, you also have the ability to manually install your Mods and Plugins
Can I import a server from another provider?
If your previous provider allows you to download a backup of your server, You are able to upload it through our FTP Service(You will need Filezilla/WinSCP)
Which Versions of Minecraft does MHS Support?
We Support any and all Minecraft server versions
Which Minecraft server variants does MHS support?
| Variant | Recommended? | |
| Paper | Yes | Lightweight / Plugins |
| Forge | Forge Mods | |
| Fabric | Fabric Mods | |
| Folia | Yes | Multithreading / Vanilla / Plugins |
| Vanilla | No | Vanilla / Poor Performance |
| PocketMineMP | Yes | Bedrock Server / Plugins |
| Nukkit | No | Dead Development |