Schedules
The scheduler on our panel is simple to use, but extremely powerful at the same time. Cycle power actions, Or create custom payloads to fit your needs, all can be accomplished with this powerful scheduling system
Creating a schedule
The panel will prompt you to create a schedule by clicking this button ![]()
You will want to choose a name for your schedule that is descriptive to its task
Our scheduler uses Cron Jobs, It can be slightly confusing at first but with this handy little website it will help you greatly in creating tasks you want to schedule on whatever basis you want to have it to be ran. https://crontab.guru Once you have found the interval you would like your task to run, Input it as you see in the website in the "Create new schedule" prompt.
Creating a Task
Now that you have created the Schedule for your server, You need some tasks for it to execute, Here is where we set that up
First off, you need to select the Schedule you would like to create a task for. Once selected it will bring up information about that specific schedule, But you are going to want to create a "NEW TASK" at the top right-ish of the content ![]()
Create Task Window
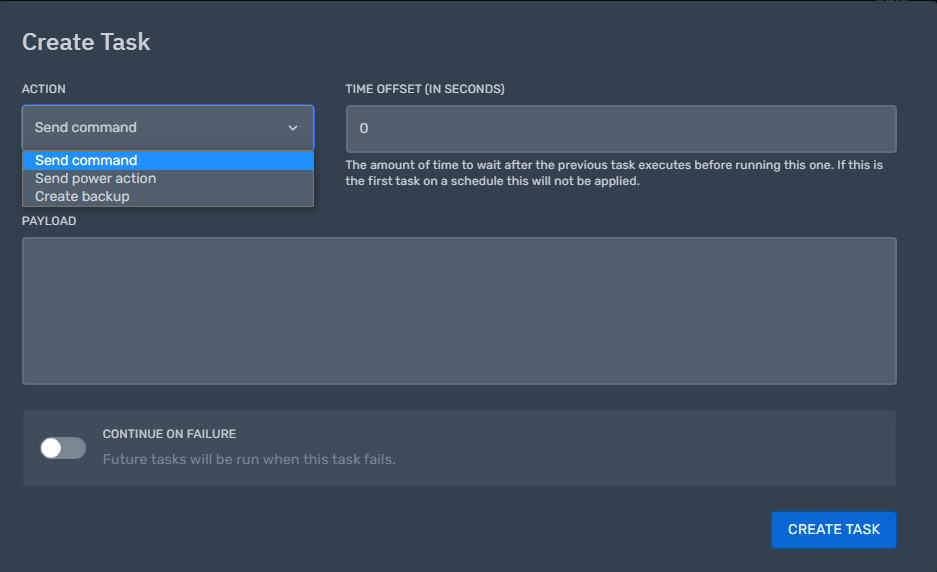
Upon opening the Create Task Window you will be greeted with a hand full of options laid out in front of you. The first of which we are going to be focusing on is the ACTION Dropdown. You will have 3 options to choose from in this dropdown section:
Send Command, Send Power Action, And Create Backup. For the sake of the explanation we will stick to "Send command"
Time Offset (In Seconds) is the amount of time to wait after the previous task executes before running this one. If this is the first task on a schedule this will not be applied.
The Payload is the command we want to send/execute. So for instance lets say we're on a Minecraft server, and we want to automate the server saying You are Awesome!. You are going to want to put "say You are Awesome!" (without the "" ) then hit
"CREATE TASK" You have successfully created your first task. You can add more tasks by repeating the shown steps, but adjust the time offset, (maybe 5-60 seconds inbetween? it depends on what your using it for)
No Comments