How to Upload your own World
This page will inform you how to upload your own world, and how to change the configuration to "activate" the world
There are several sources you can find a world file from, be it your game save folder, a public world from Minecraft Forums, or From a previous server you have ran in the past, But first things first you want to get your world file ready
Your server must have been ran once to go through a pre-setup before you upload your world
Locating World Save
to locate your save is a rather simple process, To start off you want to:
- Hit start (windows key) and type " %appdata% " and click the resulting folder
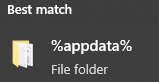
-
Locate the .Minecraft folder

-
Locate the saves folder

-
Locate and send a copy of your world folder to desktop (the folder name will be name of your world)


Best practice to rename the copy with a - (dash) instead of a space
Compress World folder & Upload to panel
In our previous step we have located our save file and sent it to the desktop
- Create a ZIP folder on your desktop (name can be whatever) and drag your world folder into it
- login to the Game Panel, Locate target server, And open the File Manager
- Drag & Drop your created ZIP folder with your world in it
- right click the uploaded ZIP folder on the File Manager, and click "Decompress"
Changing the world that the server uses
There are a couple steps that require editing the "server.properties" text file.
info on how to use multiverse to have multiple worlds will be in a future page
- In the File Manager locate "server.properties" Click it to enter the text editor
- Locate "level-name=world" Typically on, or around line 10
- change "world" to the name of the decompressed world folder that you have uploaded
- Click the "Save Content" button at the bottom right of the text editor
- Head over to the Console Tab of your server, and start your server again
No Comments