Permissions Quick-Start Guide
Permissions is a system that tells the server/plugins who can use what command/feature and difficulty can range from beginner, to expert level, But this small guide is hopefully able to help you understand a bit more about this complex system
This Guide is based off of the use of the Luckperms permission plugin
To start things off we would like to personally recommend Luckperms as your permissions plugin as it has
- A visual web editor to manage permissions with, making Luckperms one of the easiest to use permissions plugin.
- Mysql Database compatibility if you want to have more advanced setups with multiple servers
- Contexts, (under what circumstances will this permission apply) and much more
If you need help installing a plugin to your server, Please visit the page: How to Upload & Remove Plugins
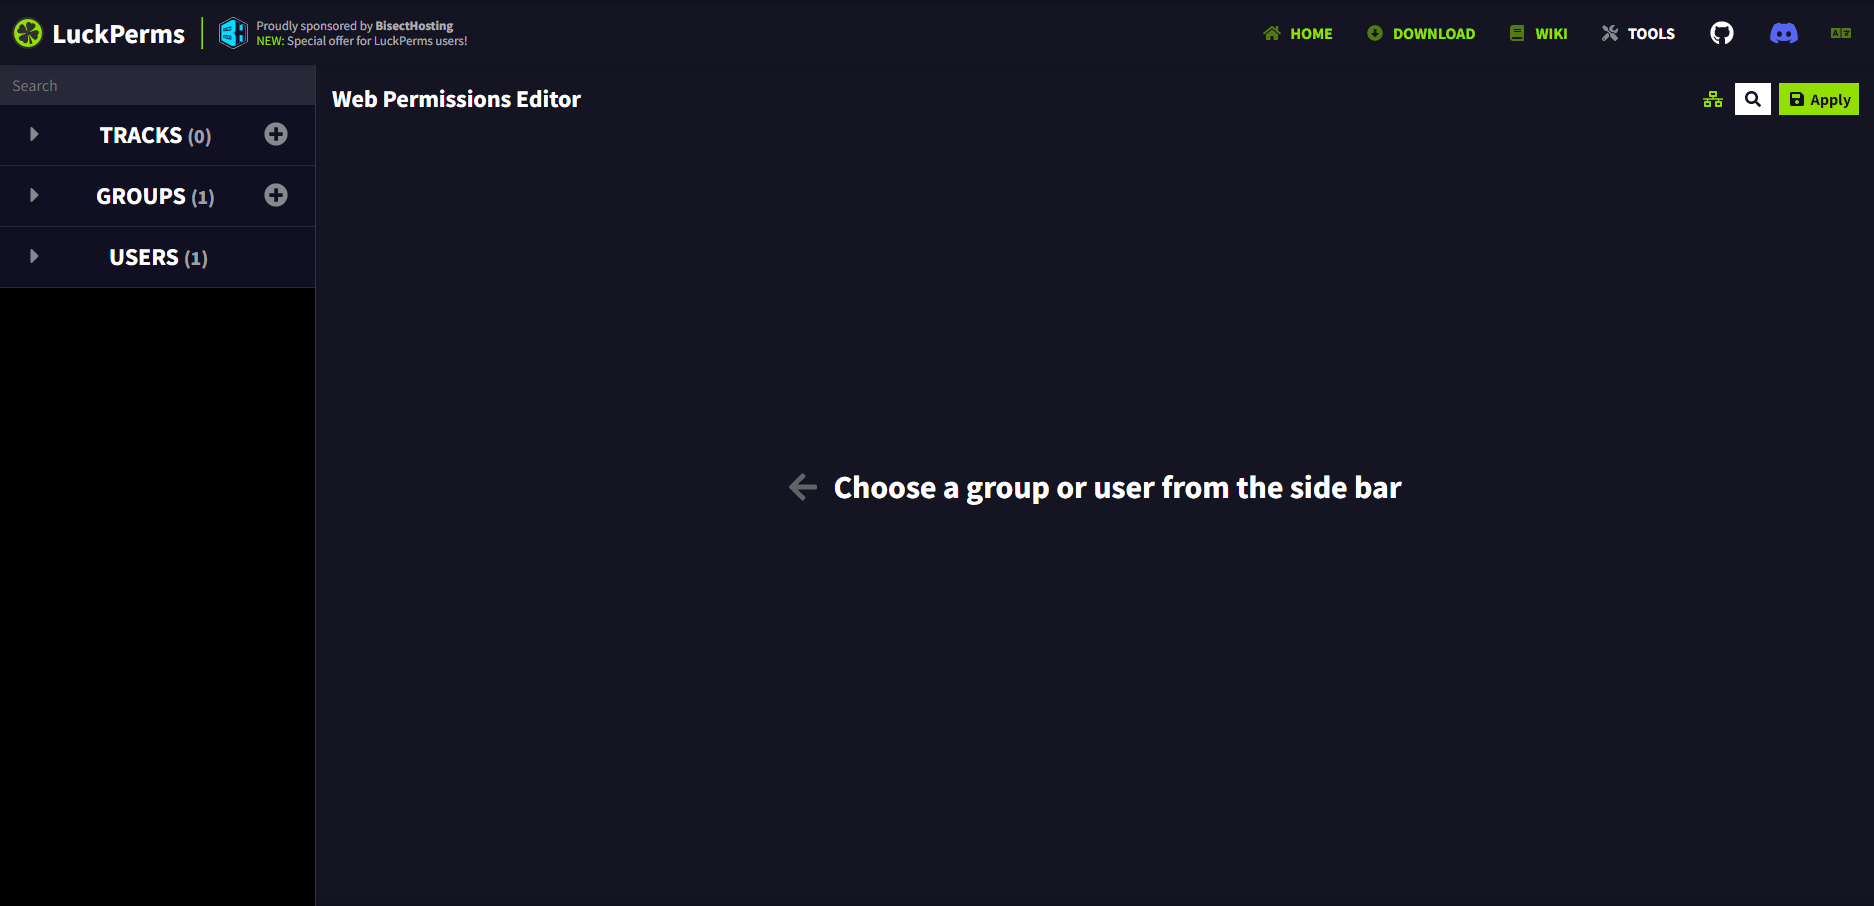
First access to the Luckperms Web Editor
The Luckperms web editor is a intuitive way to visually manage your permissions system
- Join your Minecraft server ingame, and Navigate to the Console tab on the Game Panel
-
type in the terminal:
lp user "yourusername" permission set *(remove parenthesis "", fill your ingame name in) - ingame type:
/lp editorand you will be given a link to access your permission web editor
Web editor of a fresh installation (expandable)
Creating your first Group
A Group is a functional title making applying permissions easier, every player will gain permissions applied to the default group
To create a group Click the plus button next to groups ![]()
This will open a prompt asking for multiple different pieces of information Look in the "create group prompt" dropdown for short expiations of each option
Once your group has been created it'll auto create some permissions then you can then start applying permissions to the group
Create Group Prompt (expandable)
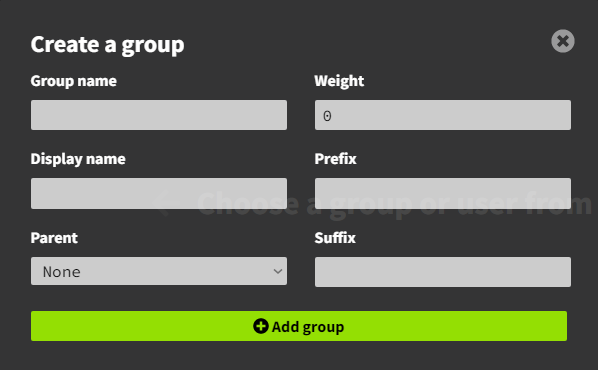
Group Name: Name of the group on web editor and commands
Weight: Higher weighted groups will override lower weighted groups
Display Name: Sets the groups display name. This can effectively be used as an "alias" for the group.
Prefix: is a piece of text shown before a player name in chat (ex. [Member], [Mod], [Admin])
Parent: Will gain permissions from selected group
Suffix: is a piece of text shown after a player name in chat
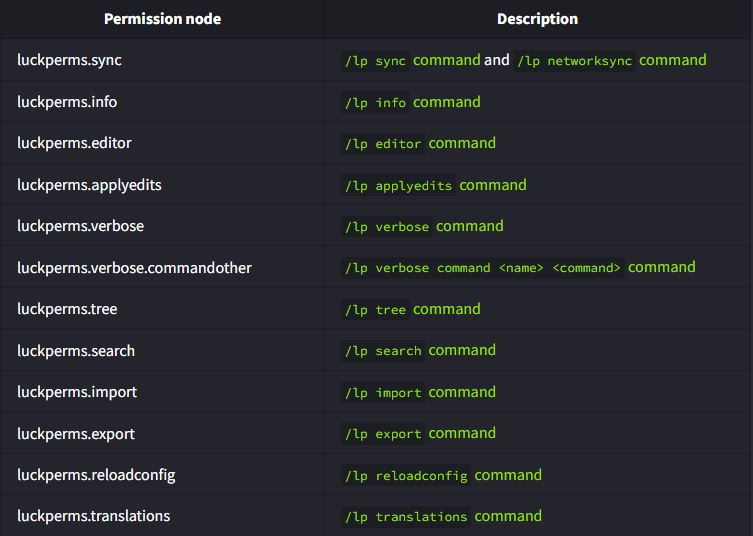
Finding Plugin Permissions
Permissions will be different for each plugin. to find permissions specific to your plugin, look around the spigot page where you downloaded it from, You can also google: Plugin name permission nodes
Example of plugin permission nodes (expandable)
Assigning permissions
To assign permissions ingame type: /lp group (group) permission set (permission.node) (Take out the () in the command)
In the Luckperms Web editor, Navigate to the Groups tab, Select your newly created group and you will see a new window pop up
Luckperms Web editor (Expand to see example)
Overview of the group: Member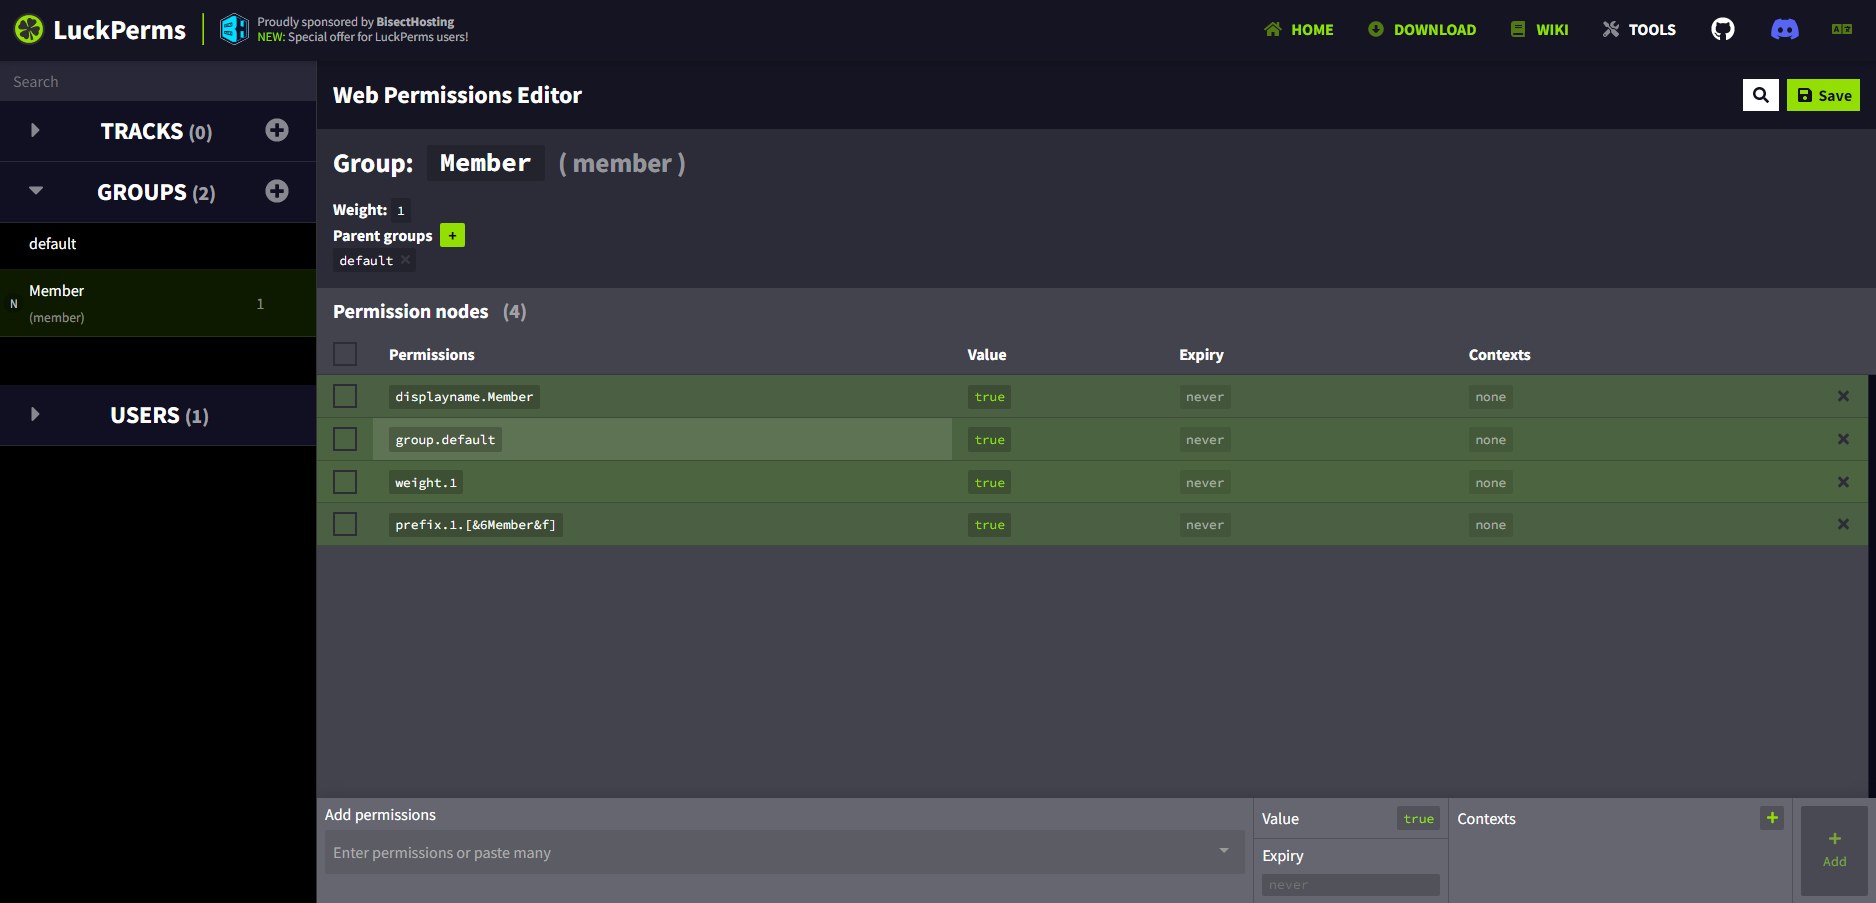
At the bottom you will a light gray bar, This will be the area you will be adding permissions
- Paste your permission node into the "Add Permission" textbox, After hitting enter, you can paste another permission in
- click the "Add" button on the far right of the light gray bar, You will notice newly added permissions will be lit up green
- Once you are done adding your permission(s), Hit the save button on the top right of the page
- It will generate you a link, You will want to take that link and paste it in your server (either ingame or in console terminal)
By no means is this a complete explanation of this powerful tool If you are looking for more advanced information, We highly suggest checking out the Luckperms Wiki
No Comments